Friday, September 30, 2011

Planning your pages

In today's digital world it can be overwhelming to open your files, even well organized files, and sort through all those pictures you have!  As time passes, it becomes even more difficult and perhaps the memories and feelings of that day have since passed.  While there are many ways in which you can plan out the pages of your scrapbook, I'm going to discuss something new that I recently stumbled upon and it's working well for me.
What is it?  It's Microsoft's OneNote notebooks. You can learn more about it here and even see a demo.  Now, I'm not trying to sell this program at all.  I happen to have it on my computer since I got the Microsoft 2010 upgrade student package last semester when I took a college course.  There is no better deal on software than for students!
OneNote allows you to establish multiple notebooks.  In my world this will equate to my separate scrapbooks (i.e.: 2011, AJ's First Year, etc.).  Once you have a notebook set up you can create a tab for each event.  I'll use the example of AJ's First Year to explain this.  I have a tab for each month since I want the album to go chronologically through time.  Within each tab you can create a page so here this will be the actual pages I plan to scrap.  Here's a look at it.
You can see my tabs along the top and my pages on the right side.  On each page you can do whatever you want!  I drag and drop some or all of the pictures I plan to use.  I type in my journaling and make notes about page ideas I have.  Sky's the limit!  Some other thoughts are to put a preview of the kit you plan to use for that page or a template.  You could post a picture of some source of inspiration. 
Now when I upload my pictures from the camera I open up my notebooks and start planning out my pages and documenting what the events were about.  Even if they don't all get scrapped, at least you will not longer have to worry about losing those precious memories.  Maybe this is something else you can add to your organizational toolkit.  I'd love to hear any other ideas and things that have worked for you!

Wednesday, September 28, 2011

Anatomy of a Page

When I began this blog my intention was to document my journey into digital scrapbooking.  I love to look back and see how I have changed in style, but it is so fun to think about all the things I've learned along the way through trial and error and through some amazing digital scrapbooking classes.  I've not shared as many tips and tricks as I would have liked to but hope to get back to doing so now that things have slowed down a bit for me on the class front.  I like showing off my pages and hope they bring inspiration to others and a few times, I've blogged a bit about the touches I've put on my scrapbook pages and I'd like to keep doing that -so I'm doing that again today!  And you can find these types of layout construction discussions going forward on my blog as, "Anatomy of a Page."  So let's take a look at the page I have today.
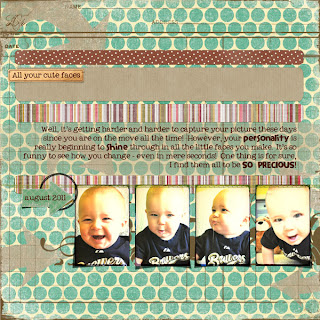

I completed this page as part of the September Blueprint Challenge at Design House Digital and the template comes from Gennifer Bursett.  And here is what I'd like to share:
1. Layer Masks: I enjoy using them not only because they are non-destructive, meaning they won't actually change the item on that layer so you can redo them as many times as you want to get them right, but secondly, they can provide some great layering effects.  I began this template with the cardstock paper and put the circle paper over it.  By including a layer mask on the circle paper layer I was able to use an arrow brush I made to stamp on it a few times and allow the cardstock to show through. It's more interesting than simply stamping down with a color and by changing the brush opacity you can control just how much shows through.
2. Shadowing: If you look closely, I have not used the same type of shadow on the entire page.  This is simply up to you personally but I find that it's fun to create interest with shadows, especially to make objects look realistic as if they are not flat on the page.  Let's focus in on this one a bit here:
The arrow appears to be peeling off the page!  There are several ways to accomplish this task but for now I will share how I did it here.  First, I used the styles to add a drop shadow at a 45 degree angle to my page.  Adjust the settings to your preference (you can always change them later!).  Then, I right clicked on the layer effect in my layers panel and choose "Create Layer."  This moves the shadow down to it's own layer.  With that new shadow layer selected, I choose Edit - Transform - Warp.  Then I pulled on the corners of the shadow to adjust where it was showing until I got the above.
3. Text on pattern paper: I have blogged before about my love for using pattern paper.  I do like the simplistic or minimalist designs as well but I now realize that I am most often drawn to patterns and distressing to create visual interest.  However, it often leaves you wondering about putting text on a page!  Let's look closer at this:
I've drawn on it a bit to highlight to you the difference in the paper in these two spots.  In order to not lose the text amongst the patterned paper I did three things.  First, I made sure to chose a font that was somewhat bold and easy to read.  A script font would not have worked well here.  Second, I chose a dark color that would contrast with most of the page.  And finally, I used a brush at a low opacity to scratch away some of the pattern to the cardstock below.  This way, your eye takes a break from the pattern and focuses on the text.  Well, at least that's what I hope!
Hopefully you've found some of this interesting, helpful, or inspiring.  Now, go do some scrapping!
Credits: Weathered Overlay by Celeste Knight; Cardstock 2, stitched tag, swirl brush, TTV Texture by Jessica Sprague, Old boris pp1 by Queen of Quirk; Joyful Paper 3 from December '09 and arrow from Lots of Labels September '09 by Creativity by Crystal; Tiny Red Dot paper from Tricolor pack by In the Making Designs; straight green stitch from Warm Wuv & Soft Hugs by Liv.E Designs; Half in circle brush 4 by Splendid Fin; Fonts: Elephants in Cherry Trees and My Own Topher.

Tuesday, September 27, 2011

The pup turns two

Last week our beloved Labrador turned two years old.  Not really a significant marker in the life of a perpetual puppy but I did reflect a bit on just how he really has changed over the last two years.  Of course, he's gotten much bigger, but he's still just as cute as when he was a puppy.  He does actually nap and sleep through the night now which is a wonderful progress.  We've been allowing him free range of the house at night but he just sleeps on his dog bed in our room - a dog bed that he has not ripped to shreds! 
Truthfully, he's a great dog.  He's completely stubborn and has selective hearing, but overall he simply wants to love and be loved.  He is excited to see people (generally too excited!) and is super great with the kiddos.  Our little guy adores him. 
In honor of Finn's birthday here are some pages I've created over time...got some recent ones on my to do list!
Papers and Elements from DHD Fall 2010 Blog Hop

Papers and Elements from You & Me by Jessica Sprague, font: Bleeding Cowboys

 Papers and Elements from Sobre La Playa by Fanette Design

Papers and Elements from "Life is Good" by Echo Park

Papers and Elements from Sun Porch by Amy Teets

Monday, September 26, 2011

New Release - Naturally - Blue

I am incredibly excited to show you my new release Naturally - Blue.  I had a wonderful time putting this one together and I am very pleased with how it has turned out.  I hope you will be too.  This kit includes many elements and papers that you will surely reach for again and again.  They will go perfectly together and hopefully will even provide you with a few basics that will add to your other collections.  You can find this new release in my store. 


Friday, September 23, 2011

Wine & Harvest Fest

I love that I grew up in a small-ish town.  I should have, but really didn't realize it is also a tourist town until I was a young adult.  One thing about the area we live in is that there are always great festivals to attend in the big and the small cities.  September in Cedarburg brings the Wine & Harvest festival!  Complete with a grape smashing contest and pumpkin regatta, there is also tons of food and, you guessed it, wine!  On a beautiful fall day, the family and some friends ventured into this great city to partake in the fun.  First a few shots of the town (I'm sad I did not get one of the busy closed-off main street!):

Above you can see the old wool mill and the historic buildings ahead that make up the downtown area.  We walked up and down viewing crafts, tasting wine, and enjoying lunch and a few sweet treats.  Then we took the kiddos to the park so they could get out of the stroller and crowds to play for a bit.  AJ doesn't walk yet so no running for him, but he does love to swing!

Here are two pages to document the day made with papers and elements from my collection, Sweet Avery, which you can pick up in my shop.